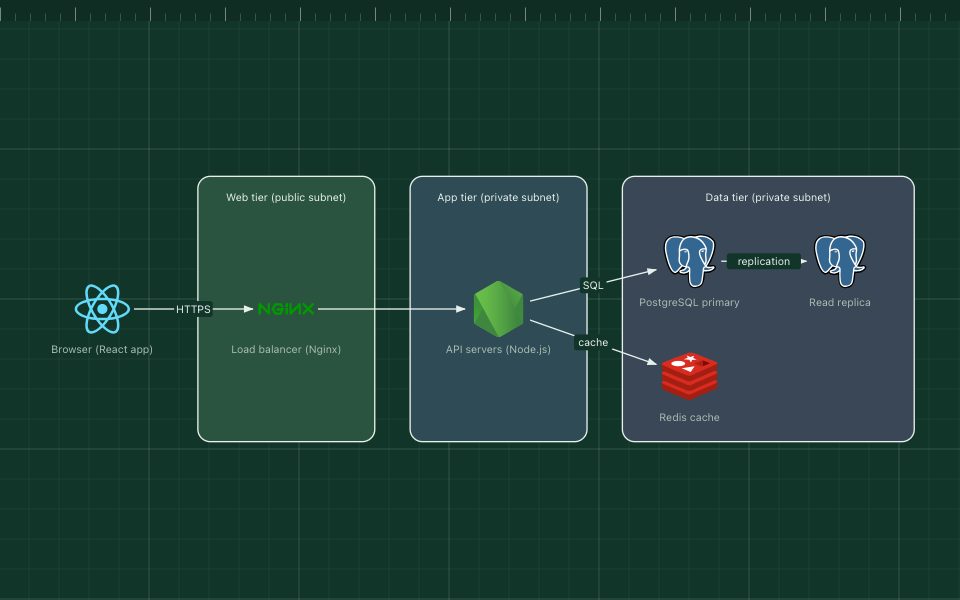
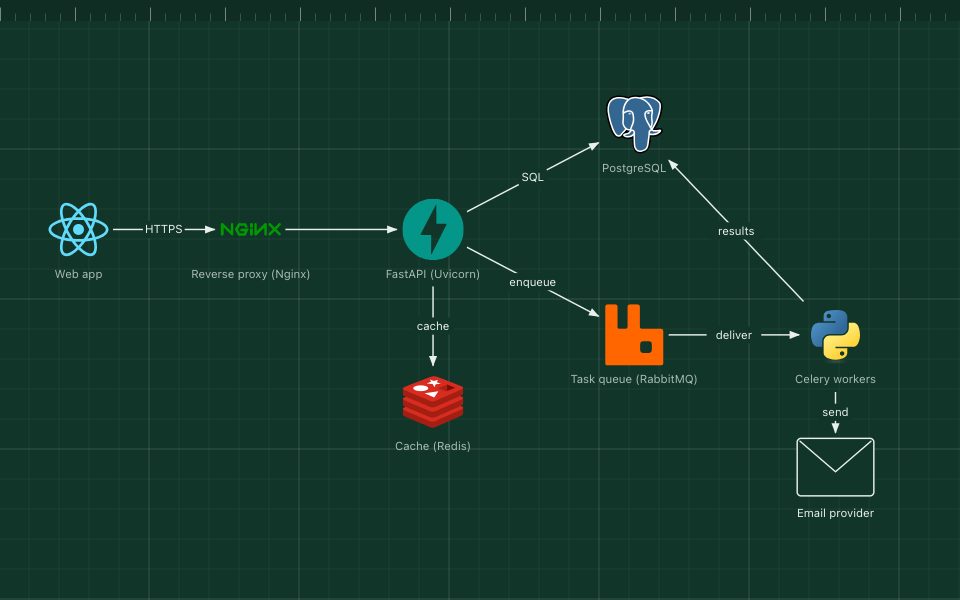
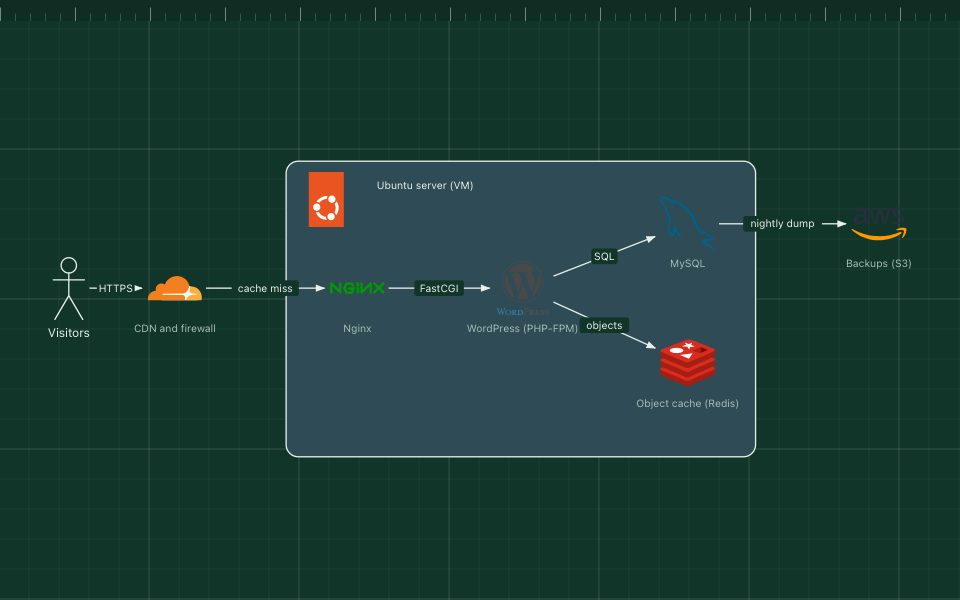
Single sign-on with OAuth 2.0 and OpenID Connect architecture diagram
OAuth 2.0 lets an application get permission to call an API on a user's behalf; OpenID Connect adds a standard way to learn who the user is. Together they power single sign-on: one login at an identity provider gives access to many apps.
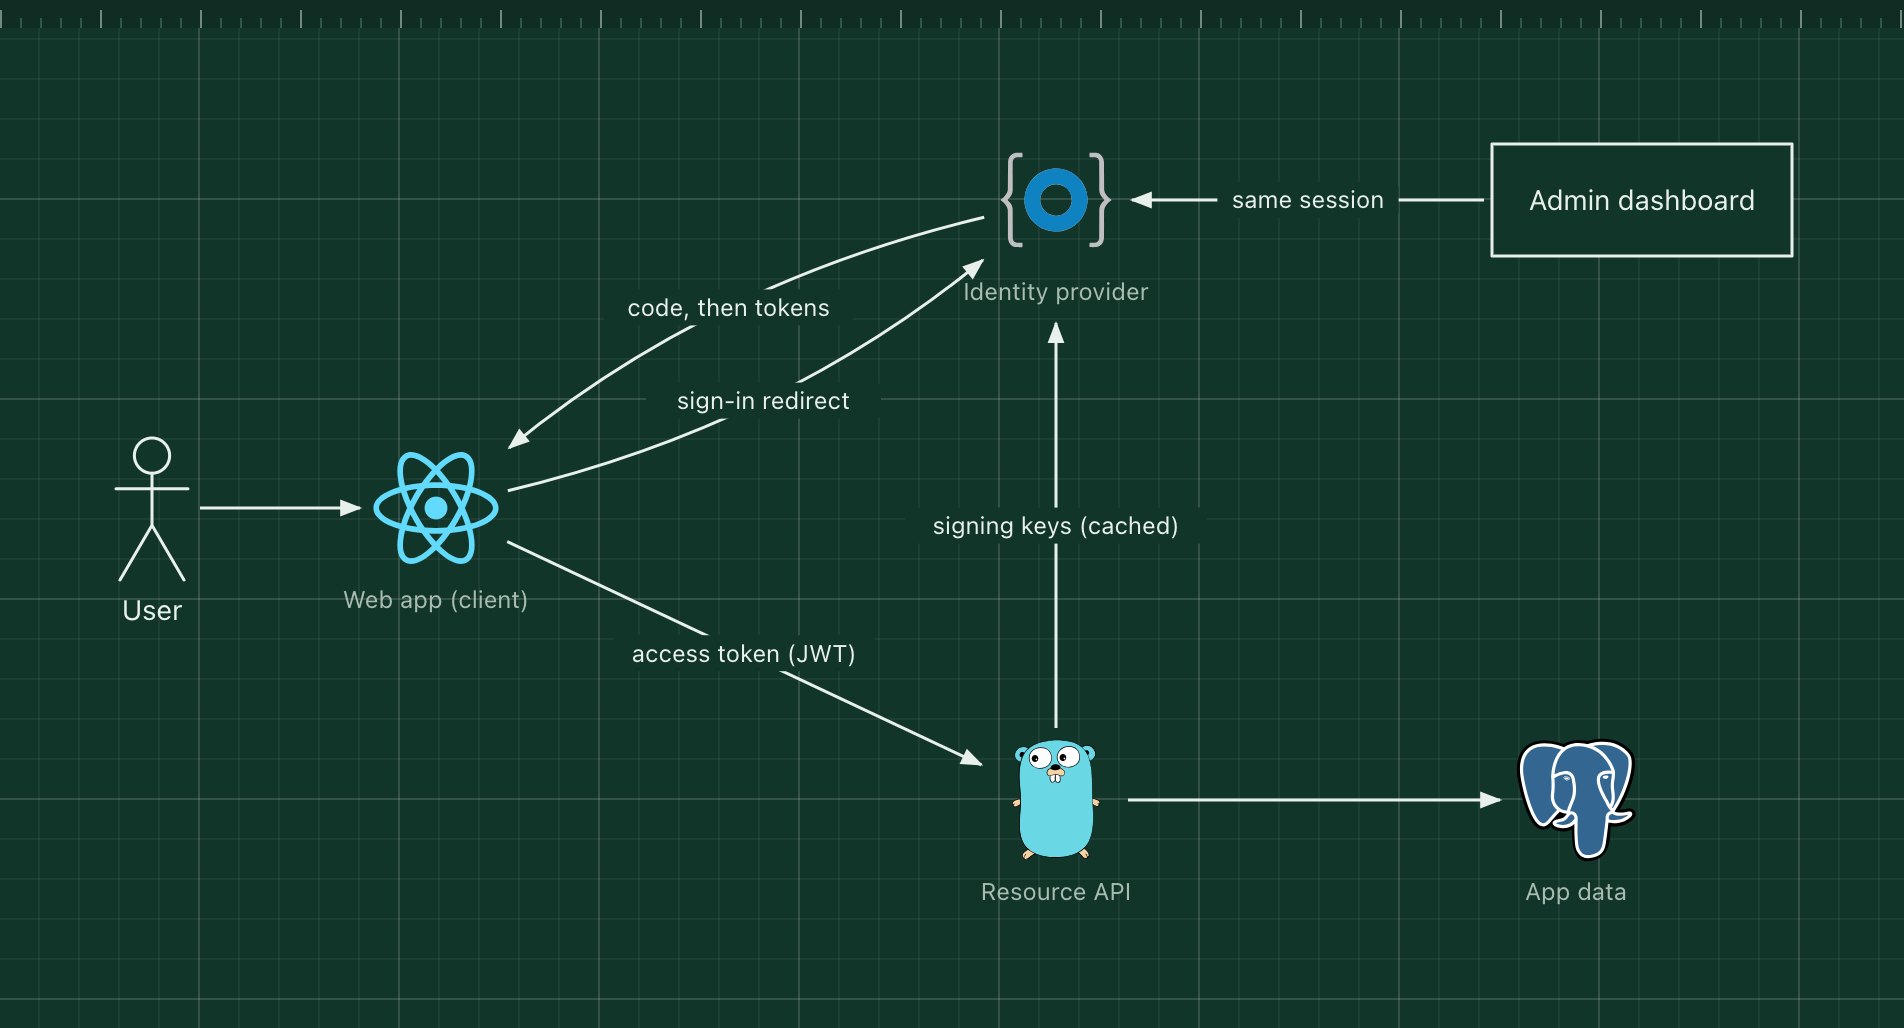
This template shows the recommended flow for browser apps today, the authorization code flow with PKCE, and how an API validates the resulting access tokens without calling the identity provider on every request.
What's in the diagram
- Web app (client)
- Redirects the user to the identity provider to sign in and receives tokens back. It never sees the password.
- Identity provider
- Authenticates the user (password, passkey, MFA) and issues an ID token and an access token. Okta is shown; Auth0, Entra ID, Keycloak and others work the same way.
- Resource API
- Accepts requests that carry a valid access token, and checks its signature, expiry, audience and scopes.
- Signing keys
- The identity provider publishes its public keys (JWKS); the API caches them to verify tokens locally.
- Admin dashboard
- A second application using the same identity provider. Because the user already has a session there, sign-in is instant.
How a request flows through it
- The user clicks "Sign in"; the web app redirects to the identity provider with a PKCE code challenge.
- The user authenticates there, and the identity provider redirects back with a one-time authorization code.
- The web app exchanges the code, together with the PKCE verifier, for an ID token and an access token.
- The web app calls the API with the access token in the Authorization header.
- The API verifies the token with the cached signing keys and checks its scopes before answering.
When to use this architecture
Use it whenever more than one application needs the same users, or when you want MFA, passkeys and account recovery without building them. Keep tokens short-lived, never put secrets in the browser app, and prefer a backend-for-frontend that holds tokens in a cookie if your threat model includes cross-site scripting.
Ways to adapt the template
- Add a backend-for-frontend so tokens never reach browser JavaScript.
- Federate to a company directory through SAML or another OpenID Connect provider.
- Use the client credentials flow for service-to-service calls.
- Add an API gateway that validates tokens once for all services.
How to customise this diagram
- Open your copy. Click Open in the editor. The template opens as your own project, saved in your browser. Nothing is uploaded.
- Rename the parts. Double-click any label, such as “Web app (client)”, type your own name, then click outside it. Arrow labels work the same way.
- Swap a technology. Select Web app (client) and press Delete. Search the icon palette for the technology you use, drag it onto the board, and reconnect it by dragging its arrow handle onto the next component.
- Add what is missing. Drag more icons or shapes onto the board. Shapes include databases, servers, users, queues, mail, alerts and scheduled jobs.
- Group related parts. Draw a rounded rectangle around related components, give it a fill colour from the selection bar, and press [ to send it behind them.
- Export or share. Save the diagram as a PNG with the camera button, download the project as JSON with Export, or copy a link with Share.