CI/CD pipeline with GitHub Actions architecture diagram
A CI/CD pipeline turns every change into something you can ship. Continuous integration builds and checks each commit; continuous delivery moves the result to environments in a repeatable way.
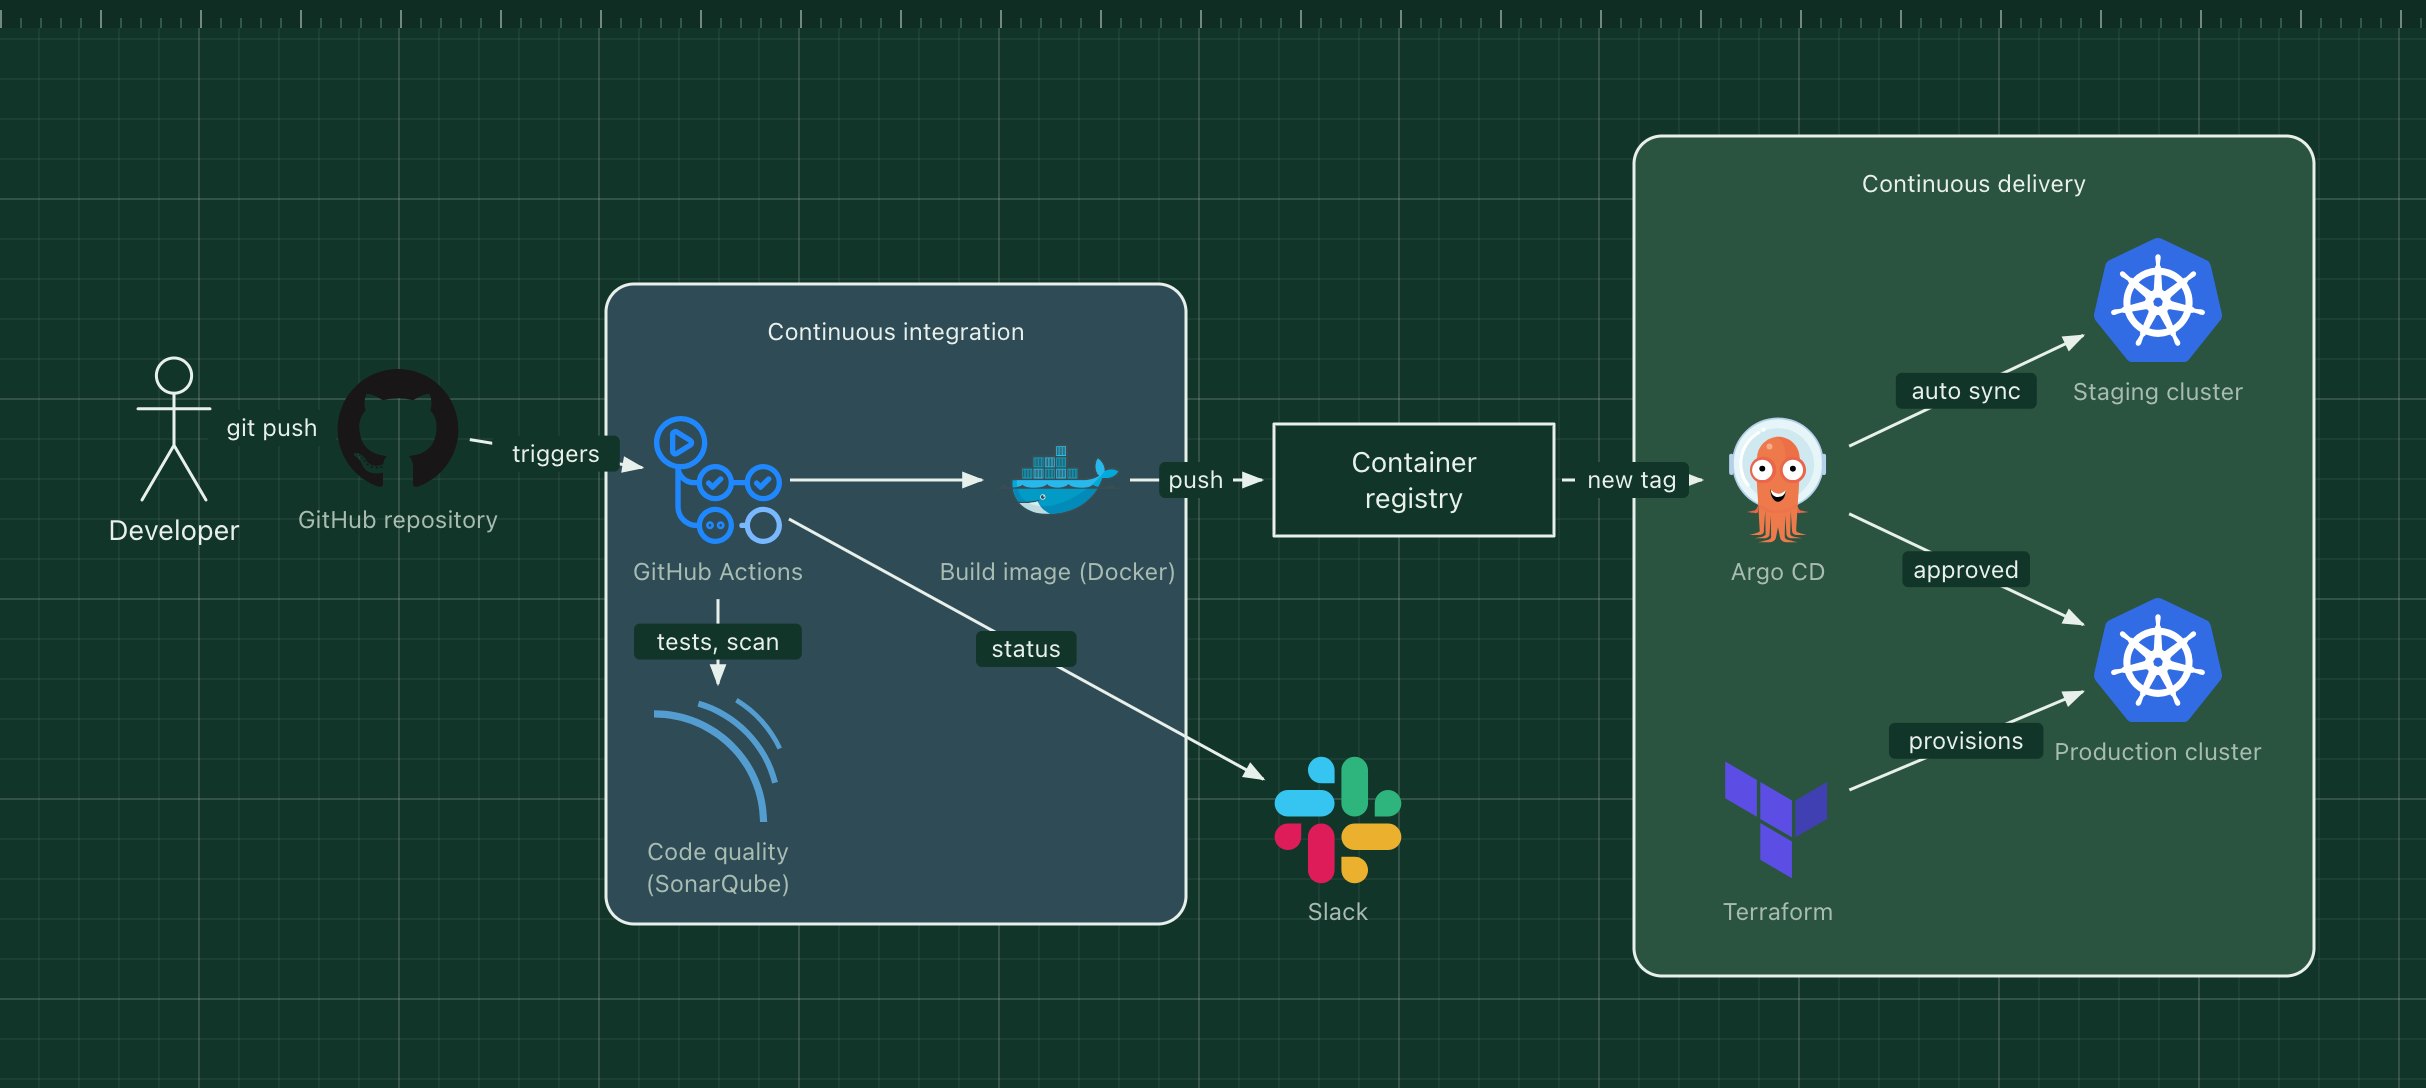
This template uses GitHub Actions for CI and Argo CD for GitOps-style delivery to Kubernetes, with Terraform managing the clusters themselves.
What's in the diagram
- GitHub repository
- Source code and the workflow files. A push or pull request starts the pipeline.
- GitHub Actions
- Runs the CI jobs: install, test, lint, build.
- Code quality (SonarQube)
- Static analysis and coverage gates. A failing gate stops the pipeline.
- Build image (Docker)
- Packages the app into an immutable container image tagged with the commit SHA.
- Container registry
- Stores the images, for example GitHub Container Registry or Amazon ECR.
- Argo CD
- Watches the desired state in git and syncs it to the clusters: automatically for staging, after approval for production.
- Terraform
- Creates and updates the clusters and cloud resources the apps run on.
How a request flows through it
- A developer pushes a commit to GitHub.
- GitHub Actions runs the tests and the SonarQube scan.
- If both pass, it builds a Docker image and pushes it to the registry.
- The new image tag is written to the deployment config, and Argo CD syncs it to staging.
- After approval, Argo CD rolls the same image out to production. Slack gets the status at each step.
When to use this architecture
Use it for teams deploying containers to Kubernetes who want every environment to be described in git. If you deploy to a platform such as Vercel or Cloudflare, the delivery half collapses into a single deploy step.
Ways to adapt the template
- Swap GitHub Actions for GitLab CI or Jenkins.
- Add an image scanning step before the push to the registry.
- Use Helm charts or Kustomize overlays for per-environment config.
- Add a canary stage between staging and production.
How to customise this diagram
- Open your copy. Click Open in the editor. The template opens as your own project, saved in your browser. Nothing is uploaded.
- Rename the parts. Double-click any label, such as “GitHub repository”, type your own name, then click outside it. Arrow labels work the same way.
- Swap a technology. Select GitHub repository and press Delete. Search the icon palette for the technology you use, drag it onto the board, and reconnect it by dragging its arrow handle onto the next component.
- Add what is missing. Drag more icons or shapes onto the board. Shapes include databases, servers, users, queues, mail, alerts and scheduled jobs.
- Adjust the zones. Zones are rounded rectangles with a fill colour. Resize them to fit, pick another colour from the selection bar, and press [ to send a zone behind the components.
- Export or share. Save the diagram as a PNG with the camera button, download the project as JSON with Export, or copy a link with Share.