WordPress on a LEMP stack architecture diagram
LEMP stands for Linux, Nginx (pronounced "engine-x"), MySQL and PHP. It is the most common way to self-host WordPress on a single virtual machine, and it scales a long way with caching in front and behind.
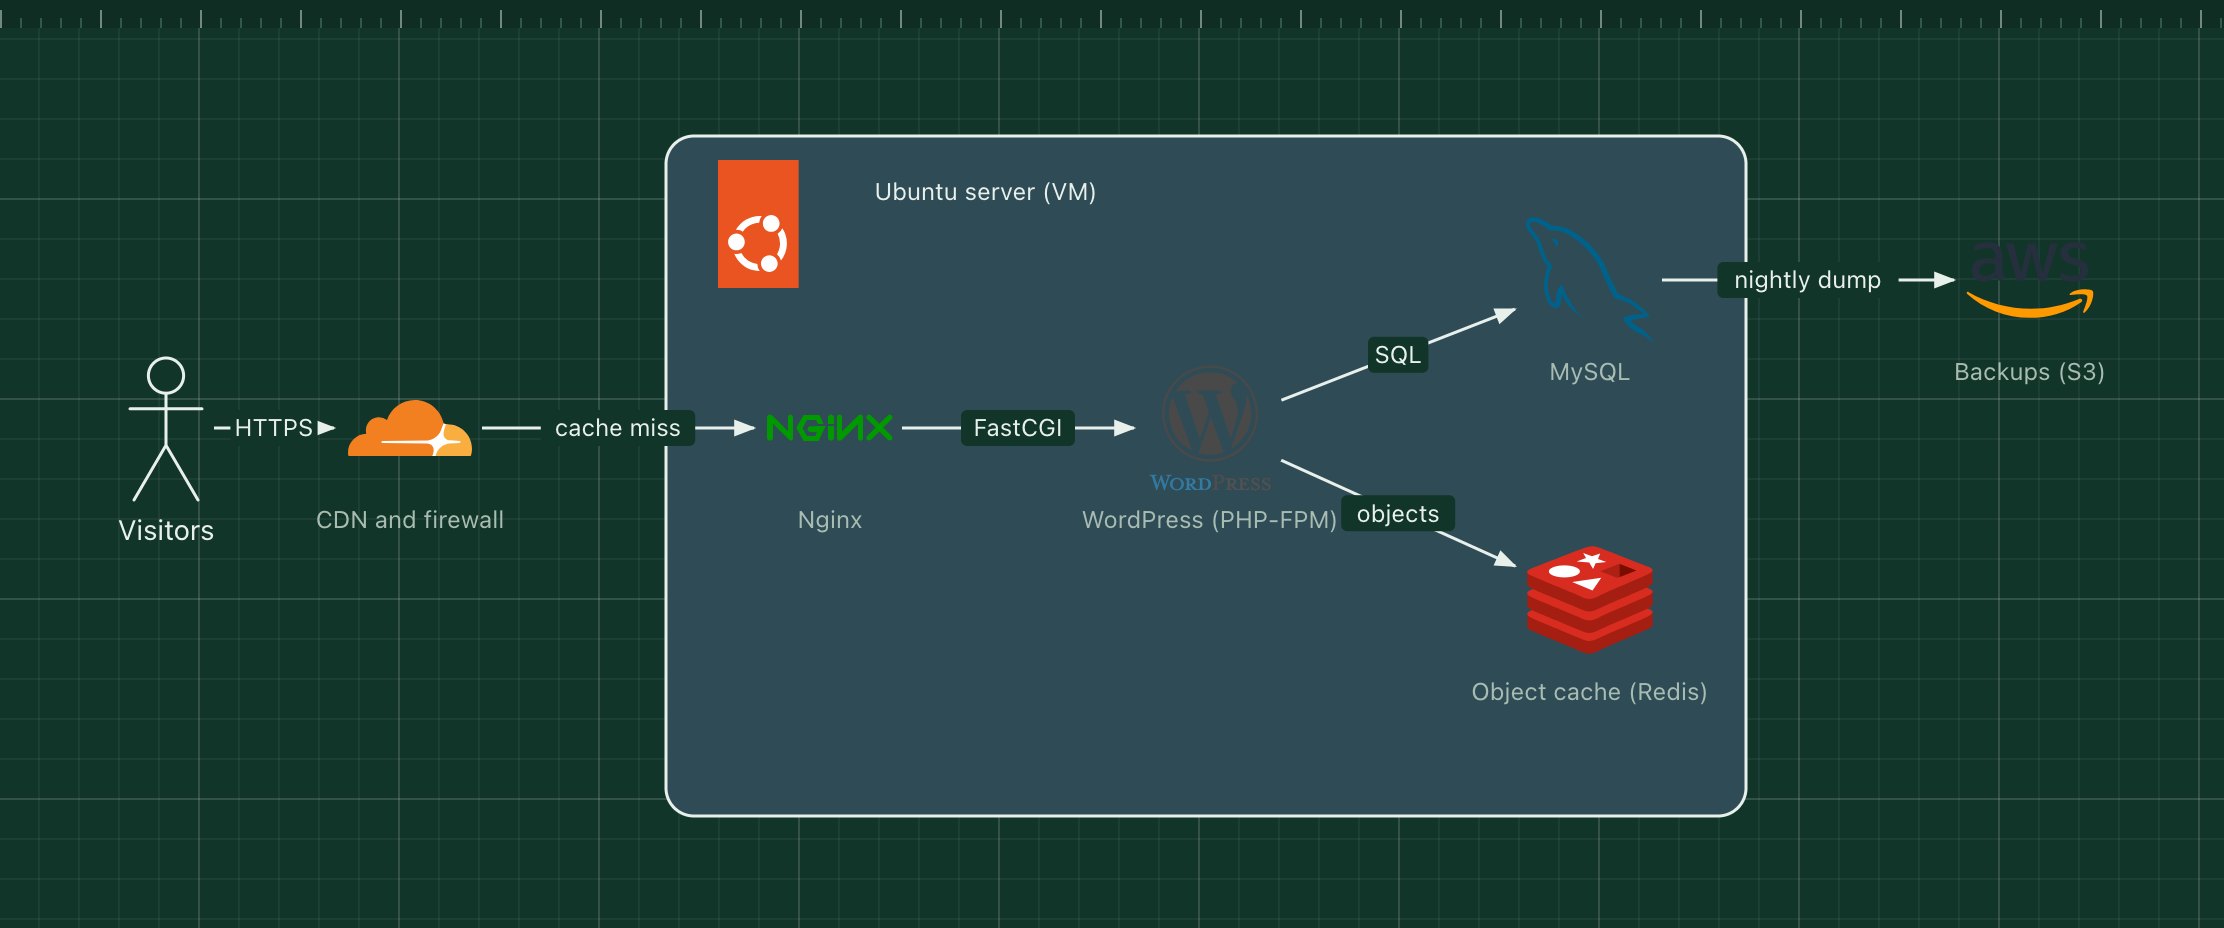
This template shows a production-ready version: a CDN that serves cached pages, Nginx and PHP-FPM on an Ubuntu server, MySQL for content, Redis as an object cache and off-site backups.
What's in the diagram
- CDN and firewall (Cloudflare)
- Caches pages and media close to visitors and filters malicious traffic before it reaches the server.
- Nginx
- Serves static files directly and passes PHP requests to PHP-FPM over FastCGI.
- WordPress (PHP-FPM)
- A pool of PHP worker processes running WordPress, its theme and plugins.
- MySQL
- Stores posts, pages, settings and users.
- Object cache (Redis)
- Keeps the results of repeated database queries in memory, which matters most for logged-in users and shops.
- Backups (S3)
- Nightly database dumps and uploads copied off the server.
How a request flows through it
- A visitor requests a page; the CDN returns it from cache if it can.
- On a cache miss, Nginx receives the request and hands it to PHP-FPM.
- WordPress builds the page, reading options and queries from Redis when cached, and from MySQL otherwise.
- The page goes back through Nginx and the CDN, which caches it for the next visitor.
- Each night a job dumps MySQL and uploads it, with the media library, to S3.
When to use this architecture
Use it for blogs, company sites and small shops where one well-tuned server is enough. When traffic or uptime requirements grow, move MySQL to a managed database and run several web servers behind a load balancer, as in the three-tier template.
Ways to adapt the template
- Move uploads to object storage so web servers become disposable.
- Use a managed MySQL service with automatic backups.
- Add a full-page cache in Nginx for anonymous visitors.
- Swap Ubuntu for any Linux distribution; the diagram stays the same.
How to customise this diagram
- Open your copy. Click Open in the editor. The template opens as your own project, saved in your browser. Nothing is uploaded.
- Rename the parts. Double-click any label, such as “CDN and firewall”, type your own name, then click outside it. Arrow labels work the same way.
- Swap a technology. Select CDN and firewall and press Delete. Search the icon palette for the technology you use, drag it onto the board, and reconnect it by dragging its arrow handle onto the next component.
- Add what is missing. Drag more icons or shapes onto the board. Shapes include databases, servers, users, queues, mail, alerts and scheduled jobs.
- Adjust the zones. Zones are rounded rectangles with a fill colour. Resize them to fit, pick another colour from the selection bar, and press [ to send a zone behind the components.
- Export or share. Save the diagram as a PNG with the camera button, download the project as JSON with Export, or copy a link with Share.